
Loft Insulation Grant in 2026
Loft Insulation Grant
Most houses have an accessible loft/attic. Studies have shown up to 25% of total heat loss from a property is from loft space and roof. This is one of the easiest, quickest to install and cheapest energy efficiency measure. Main benefits are;
- Prevent heat escaping through your roof
- Maintain the warmth inside your home
- Remarkable savings on your energy bill
- Fast and simple installation
About a quarter of the heat is wasted through the roof of an uninsulated house. Insulating your attic, loft, or flat roof is an efficient way to limit heat loss and decrease the cost of heating.
If installed correctly, the loft insulation can pay for itself several times throughout its 40-year life.
Loft Insulation Selection
If your loft doesn’t have condensation or damp issues, insulating it is simple.
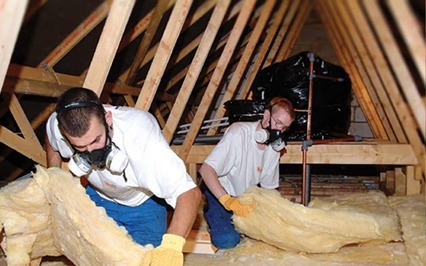
You can use mineral wool rolls if the loft is easy to access and built with standard joists.
One layer of insulation will be laid on top of the joists – horizontal beams that comprise the loft’s floor.
The second layer is laid at precisely right angles so that it covers the joists.
This will build the insulation up to the necessary depth.
Loft Insulation Dos and Don'ts
DOs:
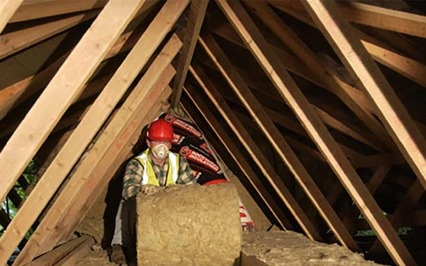
- DO wear protective clothing, such as gloves and a mask, when handling loft insulation, as it can be irritating to the skin and respiratory system.
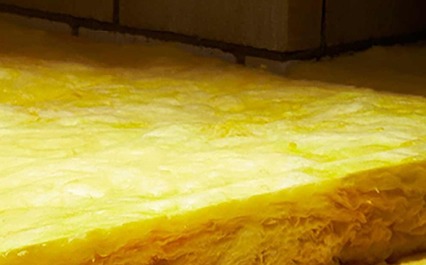
- DO make sure you have enough insulation to cover your loft space to the recommended depth for your region. The recommended depth in the UK is typically 270mm.
- DO ensure that any gaps or holes in the loft are sealed before installing the insulation to prevent heat loss and moisture buildup.
- DO ensure that loft insulation does not block any vents or air bricks in the loft, as these are important for ventilation.
- DO consider using natural, eco-friendly insulation materials, such as mineral wool insulation, which is more sustainable and have a lower environmental impact than synthetic materials.
DON’Ts:
- DON’T install loft insulation over existing insulation if it is wet or damp, as this can lead to mold growth and further damage to your home.
- DON’T install insulation around light fixtures, as this can be a fire hazard. Instead, leave a gap of at least 75mm around these areas.
- DON’T compress the insulation, as this can reduce its effectiveness and lead to heat loss.
- DON’T cover any water tanks or pipes with insulation, as this can cause them to freeze and burst.
- DON’T install loft insulation without checking the condition of your loft first. If there are any signs of damp, mold, or structural issues, these will need to be addressed before installation.
Things to be considered during Loft Insulation
Room in Roof (RIR)
If you use your loft space for living, you must ensure that the ceilings and walls between the heated and unheated areas are insulated.
- Slope roofs can be insulated similarly to how you would in a warm ceiling; however, they are insulated with plasterboard inside the insulation.
- The vertical walls are also insulated in the same manner.
- Ceilings with flat surfaces can be insulated just like a loft.
Insulate all areas of the ceiling and walls around dormer windows, and you should use high-performance glass for the window or any skylights.
Like warm loft insulation, this isn’t something you can do yourself. Hire an expert installer to ensure your insulation’s suitable and fully installed and that there is adequate ventilation when needed.
Warm loft
Another option to protect your loft is to install insulation over and between the rafters, which are the sloping logs that form the roof.
It is possible to use rigid insulation boards, carefully cut to the correct size or foam insulation applied over the roof rafters.
Advantages:
- The roof will be warmer than traditional loft insulation, so you won’t have to bother about pipes and tanks freezing.
- -It is possible to board the floor to store things without raising it to add depth.
Disadvantages:
- Insulating at the rafter level is significantly more expensive than conventional loft insulation.
- In addition to insulating the roof, you’ll also need to cover any gable walls, chimneys, and party walls within the loft area. If you do not insulate these areas, then heat will be lost by the new insulation.
Certain companies might offer to repair the roof leak or damage by using foam insulation on the roof’s surface without first addressing the issue. We don’t recommend you try this.
Like any other type of insulation, you must ensure that the roof is dry and in good shape before adding any insulation.
To make your loft a room, you must adopt the Room In Roof (RIR) approach.
Ventilation
Air has to flow in and out of your home to remain clean, dry and healthy. If you’re working on DIY insulation, ensure you don’t cover any grilles, vents or airbricks.
An experienced contractor will ensure not to hinder or stop any intended vents.
Storage Space
If you use your loft or attic to store things, it is recommended to place boards on top of the joists. If you cover the joists with insulation before making this move, the insulation won’t be sufficient in thickness.
To get the right amount of insulation, you can raise the height of the floor so that you can install sufficient mineral wool under the floor’s new at a higher level.
This can be accomplished by installing timber battens over the joists or purchasing specially-designed plastic legs that can fit onto the joists to support the flooring.
It is essential to leave an air gap that is ventilated between the boards and the insulation to stop condensation from the underside of the board.
Don’t compress the mineral wool when you put the boards on top since this could decrease its insulation.
Damp lofts
Insulation prevents heat from living spaces, making your loft area cooler, which can cause or increase the severity of existing dampness or condensation issues.
If you’re making loft insulation yourself, you should remember that you may have to keep property ventilation.
Consult a professional before installing insulation to determine how you can solve any damp issues first.
Flat roofs
A flat roof is best to be covered with insulation from above.
A layer of insulation board can be placed over the roof’s weatherproof layer or directly over the timber roof’s surface with an additional layer of weatherproofing over the insulation.
This is the best option if the roof’s covering requires replacing. If your home’s flat roof needs to be replaced in the future, then you should seal it to ensure compliance with the building regulations.
You can make a flat roof more insulating from beneath; however, this can cause condensation issues if it is not done properly.
Flat roof insulation may reduce your heating costs as loft insulation.
The savings can vary based on the extent to which the home is flat.
Inaccessible loft spaces
If the loft in your home is difficult to access, it is possible to get blown insulation.
We use specialist equipment to blow suitable insulation materials into any problematic space.
Mineral wool fibers as well as treated cellulose or polyurethane foam, can be used for this.
Costs and savings - England, Scotland and Wales

Pipes, loft hatch and water tank
The insulation between the joists in your loft can keep your home warm and makes the space above freezing.
This means that pipes and water tanks in the loft are more susceptible to freezing and you’ll need to shield them.
If the water tank is located some distance away from the hatch in your loft, you’ll need a walkway to ensure safe access.
The cooler air inside the loft you have insulated may result in cold draughts coming from the roof hatch.
To stop this from happening, install the attic with insulation. You can also apply a draught-proofing strip on the hatch’s edges.
How to Insulate a Loft Hatch
Insulating your loft hatch can help to prevent heat loss and improve the energy efficiency of your home. Here’s how you can do it:
Measure the size of your loft hatch to determine how much insulation material you will need. You can use mineral wool, fiberglass or foam board insulation, depending on your preference and budget.
Cut the insulation material to the size of your loft hatch, leaving a small gap around the edges to allow for ventilation.
Attach the insulation to the hatch using adhesive tape or glue. If using foam board insulation, you can also use screws or nails to hold it in place.
Cover the insulation with a piece of plywood or other board material to protect it from damage.
Install weather stripping around the edge of the loft hatch to create a seal and prevent drafts.
Consider adding a hatch cover or blanket to further improve insulation and prevent heat loss.
Remember to wear protective clothing, such as gloves and a mask, when handling insulation materials, as they can be irritating to the skin and respiratory system.
Apply For Loft Insulation under ECO4 Grant
We're satisfied with the service and highly recommend it to anyone considering Loft Insulation.
Rating:
Rated 5 out of 5